Today I would be discussing about a very innovative type of tile called Subway Tile. Let us know all the important things related to subway tile.
Table of Contents
What Is Subway Tile?
Subway tile is a type of rectangular tile that was named after the tiles found in the New York City subway system. The original subway tiles were made of white glass, but they now come in many different materials, colors, and sizes that you can use in your kitchen.
Typical subway tiles are shown in the image below.
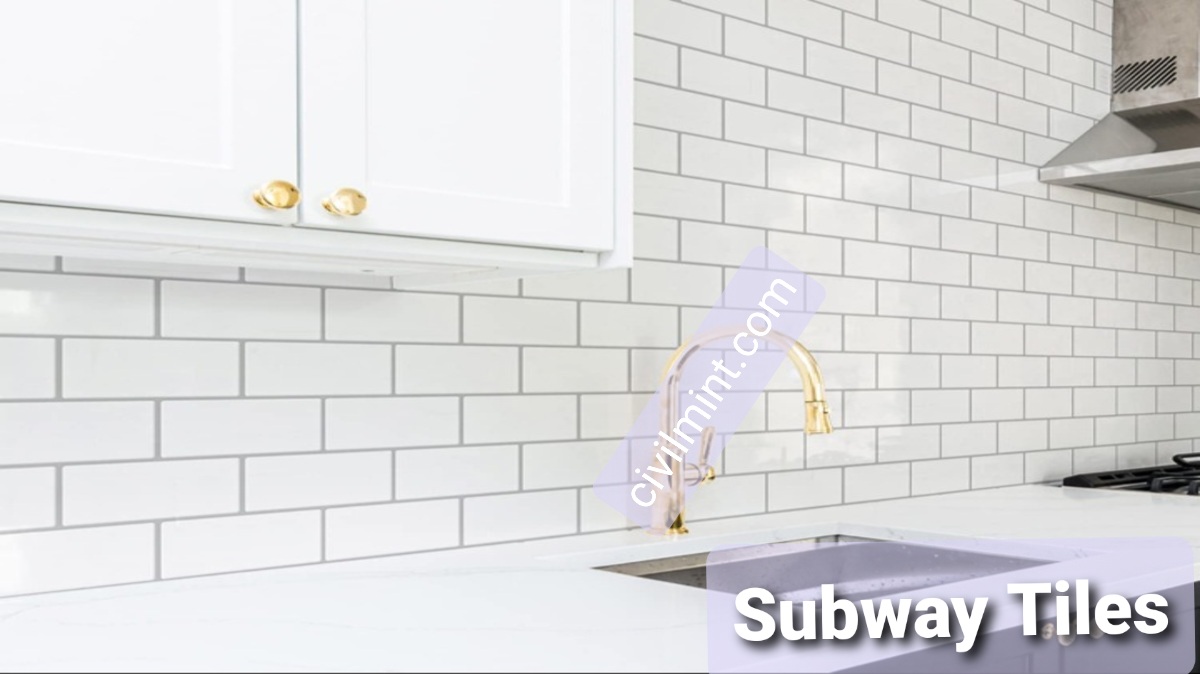
Subway tile is a great option for your kitchen because it is so versatile and can match with any style. It is also cheap, which means you can get it without spending a lot of money.
You can find subway tiles at home improvement stores or specialty tile shops, in-store and online. They come in many different materials, colors, and textures, so you can find the perfect one for your kitchen.
Overall, subway tile is a popular and useful option for your kitchen backsplash.
Size Of Subway Tile
Subway tiles are typically available in various sizes, including:
- 7.62 cm x 15.24 cm (3 inches x 6 inches)
- 10.16 cm x 20.32 cm (4 inches x 8 inches)
- 10.16 cm x 30.48 cm (4 inches x 12 inches)
- 5.08 cm x 10.16 cm (2 inches x 4 inches)
It’s worth noting that these sizes may vary slightly depending on the manufacturer or supplier.
A Guide to Materials and Styles
Looking to spruce up your kitchen with a fresh new backsplash? Consider Subway Tile! It is a classic and versatile design that not only looks great but also protects your walls from stains and spills. But before you start your project, you’ll want to consider the different materials available.
Ceramic tiles are the most affordable and durable option, while glass tiles offer a sleek and modern look. Marble and granite tiles provide a luxurious touch but come at a higher price point and require more maintenance. Stone tiles have a natural and rustic feel and are highly durable but require regular sealing to prevent staining.
No matter which material you choose, a subway tile backsplash is an easy way to upgrade the style of your kitchen. Mix and match different materials for a unique look that fits your personal taste and budget.
How To Install Subway Tiles
The process of installing subway tiles is not that difficult but I would recommend hiring skilled workers to install subway tiles.
Here’s a step-by-step process for installing subway tiles.
- Collect materials: You’ll need subway tiles, tile adhesive, grout, a notched trowel, a tile cutter, tile spacers, a level, a measuring tape, a pencil, a sponge, and a bucket.
- Prepare the surface: Ensure that the surface where you’ll be installing the tiles is clean and free of any dirt, debris, or grease. You may need to sand or prime the surface before applying the tile adhesive.
- Measure and mark: Measure the area where you’ll be installing the tiles and mark it using a pencil. Use a level to ensure that your lines are straight.
- Cut the tiles: Use a tile cutter to cut the subway tiles to fit the space. Take note of any outlets, switches or corners that may require special cuts.
- Apply the tile adhesive: Using a notched trowel, apply a layer of tile adhesive to a small section of the wall. Spread the adhesive evenly and make sure the ridges are running in the same direction.
- Place the tiles: Place the tiles onto the adhesive, starting from the bottom of the area you’re tiling. Press the tiles firmly into place, using tile spacers to ensure that the gaps between the tiles are even. Continue this process, adding adhesive and tiles until the area is covered.
- Cut tiles to fit: As you approach the end of a row or reach an outlet or corner, you may need to cut tiles to fit. Use a tile cutter to make precise cuts.
- Allow the adhesive to dry: Once you’ve finished placing all the tiles, allow the adhesive to dry according to the manufacturer’s instructions.
- Apply grout: Using a rubber float, apply grout to the gaps between the tiles. Work in small sections, spreading the grout evenly and pressing it into the gaps. Use a damp sponge to wipe away any excess grout before it dries.
- Allow the grout to dry: Once you’ve finished applying the grout, allow it to dry according to the manufacturer’s instructions.
- Clean the tiles: Once the grout is dry, use a damp sponge to clean the tiles, removing any grout haze or residue.