In this blog article, I am going to explain step by step procedure of H2S gas detector calibration.
Table of Contents
Introduction:
It is important to calibrate a hydrogen sulfide (H2S) gas detector to ensure accurate and reliable readings of H2S levels in the environment. Calibration helps maintain the sensitivity and accuracy of the instrument, thereby ensuring its effectiveness in detecting dangerous gas concentrations.
Let’s know step of step procedure to calibrate H2S gas monitor.
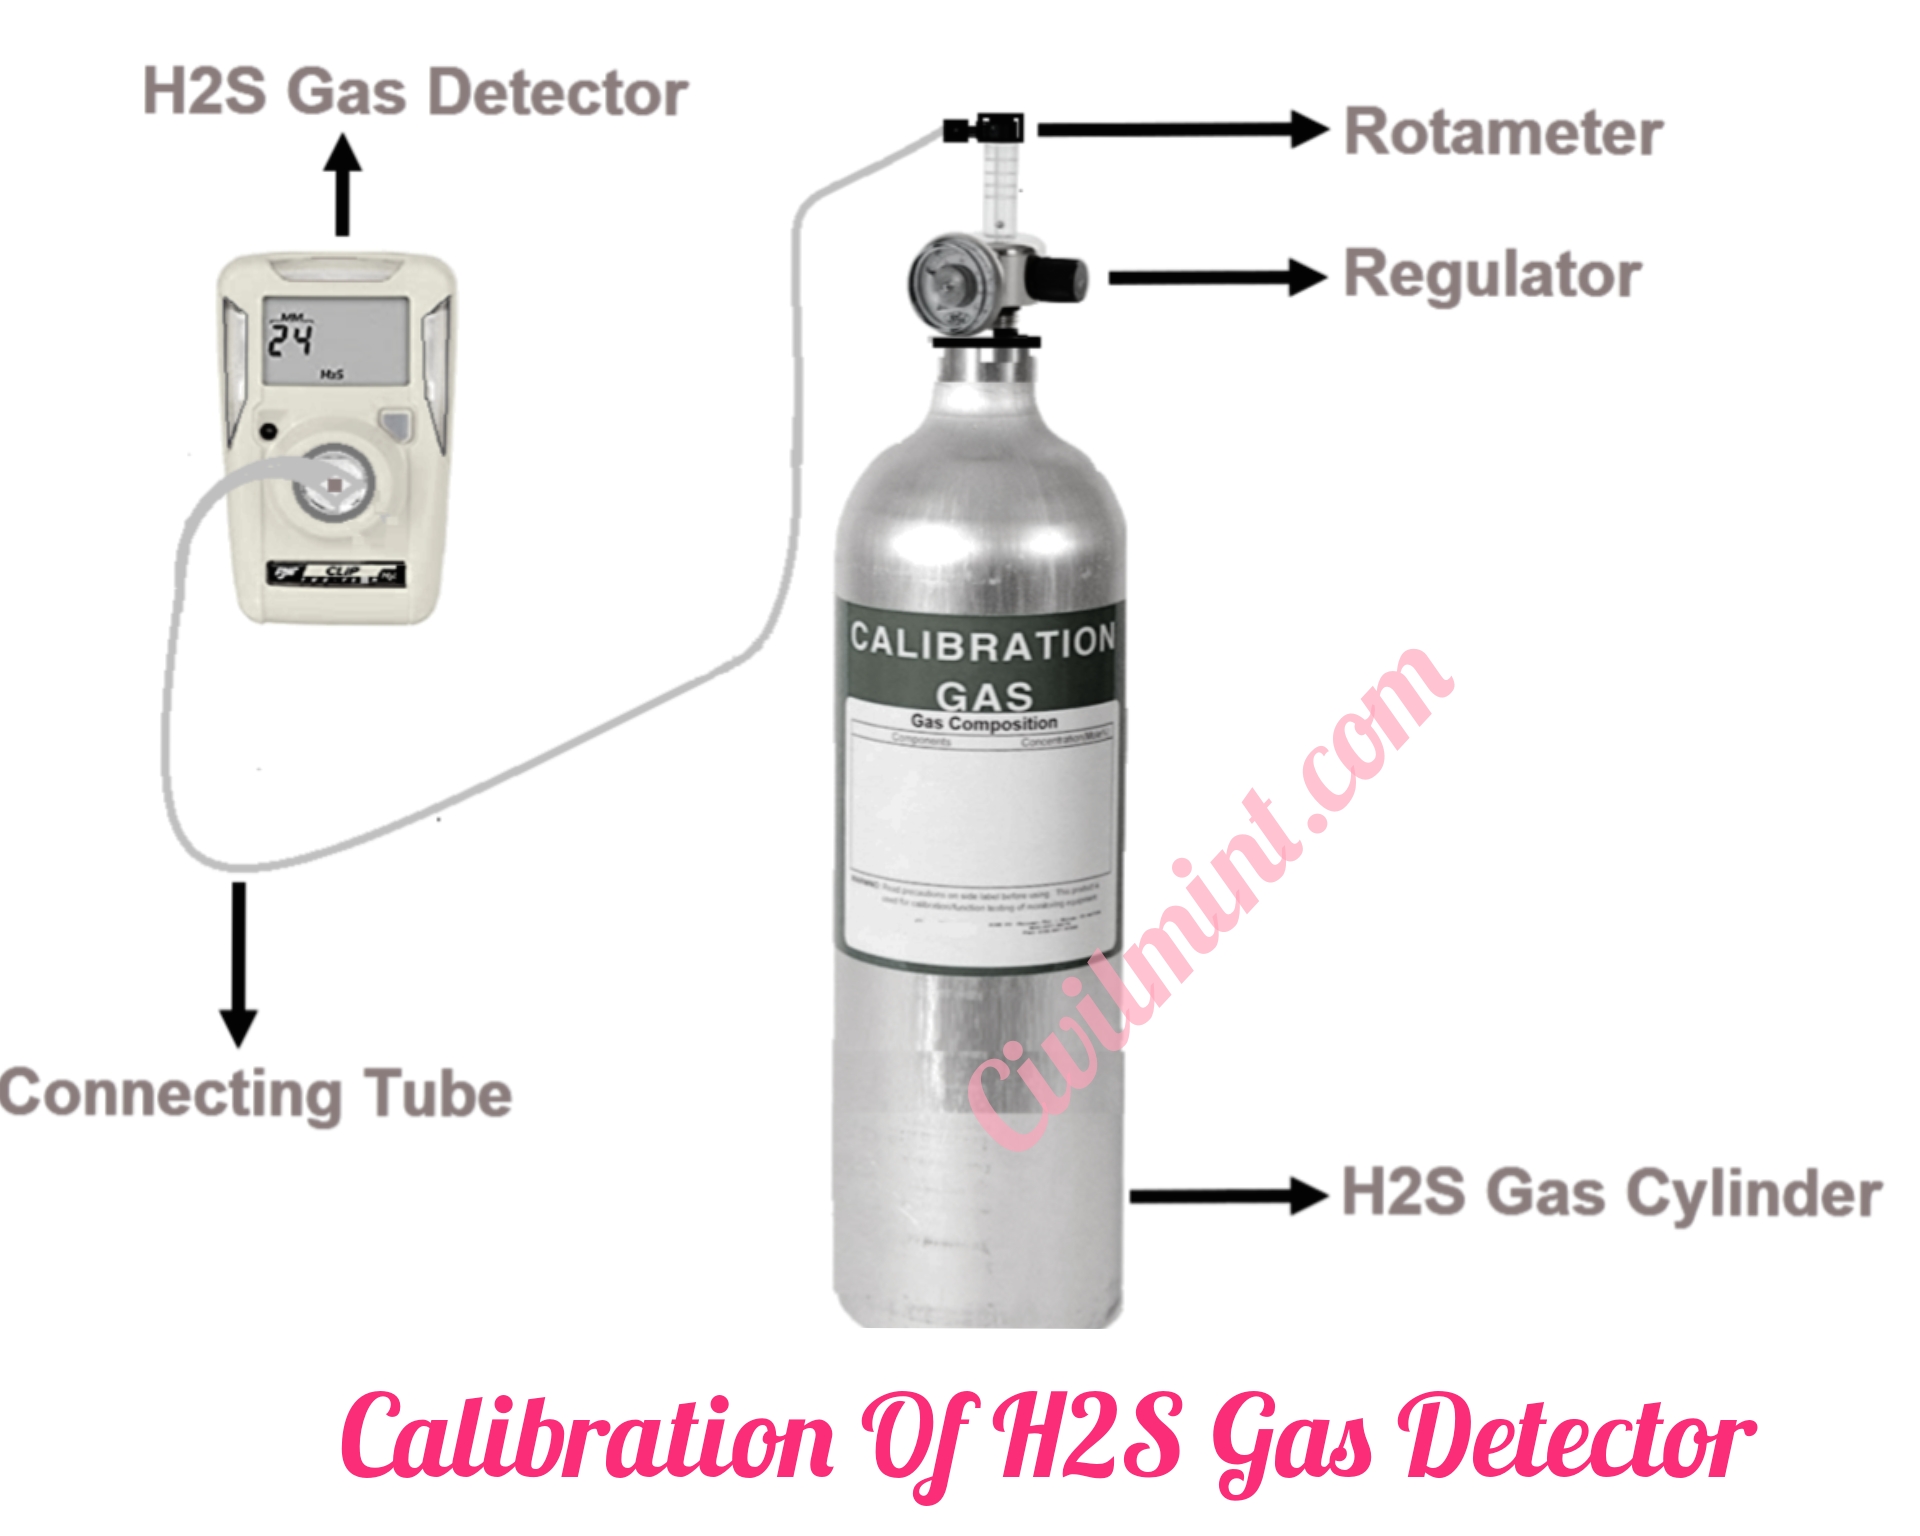
Calibration Of H2S Gas Detector
Step 1: Safety Precautions
- Before starting the calibration process, ensure you are in a well-ventilated area and wearing appropriate personal protective equipment (PPE).
- Ensure the gas detector is in a safe mode, away from potentially hazardous gas sources.
Step 2: Gather Equipment and Materials
- Check the manufacturer’s instructions for the recommended calibration gas cylinder and regulator for your specific detector model.
- Prepare the calibration gas cylinder, regulator, calibration adapter, tubing, and any necessary tools.
Step 3: Zero Calibration (Fresh Air)
- Turn on the gas detector and allow it to warm up according to the manufacturer’s instructions.
- Attach the regulator to the calibration gas cylinder and connect the tubing to the regulator’s outlet.
- Use the calibration adapter to connect the other end of the tubing to the gas detector’s calibration port.
- Place the gas detector in an area with fresh air, away from any gas sources.
- Initiate the zero calibration process according to the manufacturer’s instructions. This process sets the baseline reading of the detector in clean air.
Step 4: Span Calibration (Calibration Gas)
- Replace the fresh air cylinder with the calibration gas cylinder containing the appropriate concentration of H2S gas.
- Initiate the span calibration process according to the manufacturer’s instructions.
- Allow the gas detector to sample the calibration gas for the specified duration.
- The gas detector will adjust its reading to match the known concentration of H2S in the calibration gas. Some detectors may require manual adjustments using calibration screws.
Step 5: Verification and Adjustment
- After completing the span calibration, perform a quick bump test or verification test using a bump test gas to ensure the detector’s response aligns with the expected values.
- If the readings are not within an acceptable range, consult the manufacturer’s guidelines for troubleshooting and adjustments.
Step 6: Documentation
- Record the calibration date, time, calibration gas concentration, and any deviations from expected readings.
- Keep a log of all calibration activities, including dates, results, and any corrective actions taken.
You might also like: How To Use T40 Rattler
My Advice:
Calibration of H2S gas detectors is an important task for accurate detection of hydrogen sulfide gas concentrations.
Following manufacturer’s guidelines and proper procedures will help maintain detector effectiveness and enhance safety in environments where H2S exposure is a concern.
Always refer to the user manual provided by the manufacturer for specific instructions.
I hope you liked this article!
If you have any question, please hit the comment box.