Table of Contents
What Is Liquid Limit Test Of Soil?
The liquid limit test of soil is a test frequently done in geotechnical engineering to calculate the amount of water in soil at which it changes from a liquid to a soft, moldable state. This test helps us understand how sticky and flexible the soil is, especially if it contains a lot of clay.
Before taking deep dive into this blog article, we will know little bit about liquid limit of soil.
What Is Liquid Limit Of Soil?
The liquid limit of soil is an important property that tells us how the soil behaves.
It is like a special point where the soil changes from being soft and moldable to becoming like a liquid. We can find this point by adding water to the soil under specific conditions.
The liquid limit shows us the minimum amount of water needed for the soil to flow like a thick liquid all by itself.
Test Description
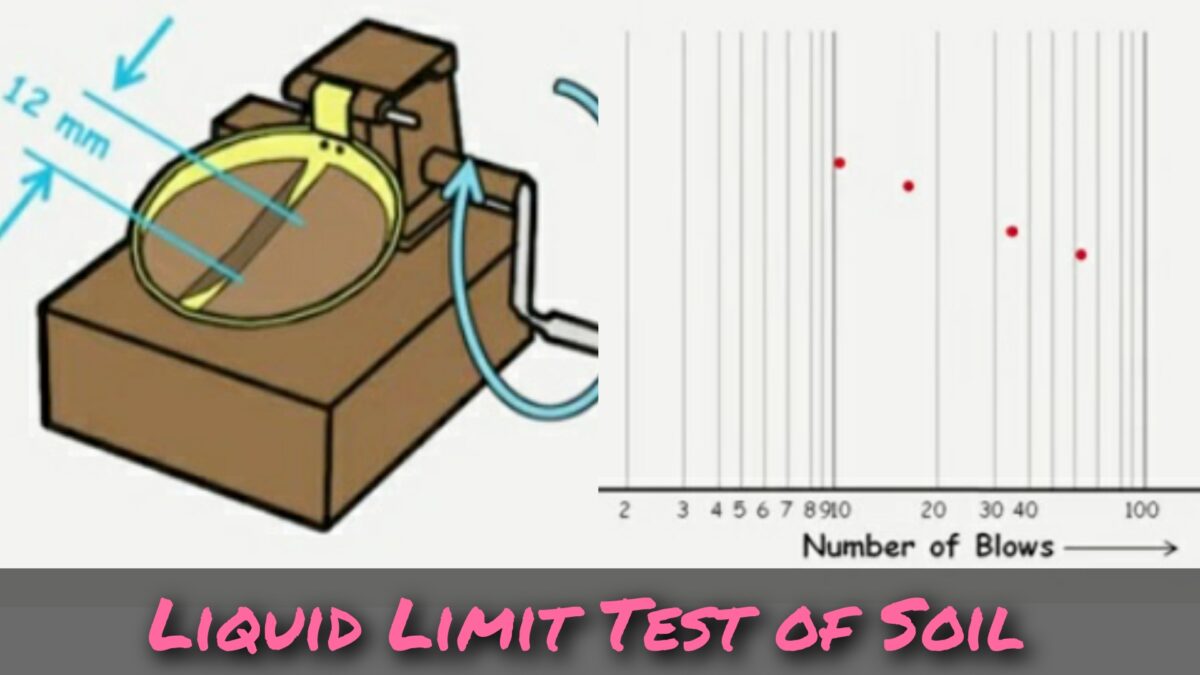
The liquid limit of a soil refers to the moisture content at which the soil exhibits properties resembling that of a liquid, while possessing limited shear strength. In order to determine this value, a specialized apparatus known as Casagrande’s liquid limit device is employed. The device measures the number of blows required for the soil to flow and close a groove made in it.
Since achieving precisely 25 blows during a single test can be challenging, multiple tests are conducted, typically ranging from three to four. Each test determines the number of blows (N) necessary to achieve closure. Subsequently, a semi-logarithmic plot is constructed by plotting the logarithm of N against the corresponding water content (w) of the soil.
By examining the plotted data, the water content corresponding to N=25 is identified. This value represents the liquid limit of the soil and is obtained from the plot, providing a reliable measure of the soil’s behavior when it reaches a state resembling a liquid while possessing minimal shear strength.
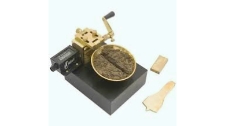
1. Test Apprratus
- Liquid limit device developed by Casagrande
- Grooving tools (both standard and ASTM types)
- Oven
- Evaporating dish or glass sheet
- Spatula
- 425 micron IS sieve
- Weighing balance with an accuracy of 0.01g
- Wash bottle
2. Test Procedure
- Adjust the drop of the cup in the liquid limit device to 1 cm by loosening the screws, using a grooving tool or gauge. Tighten the screws after adjustment.
- Take 120g of air-dried soil passing through a 425 micron IS sieve.
- Mix the soil thoroughly with distilled water in an evaporating dish or glass plate until a uniform paste is formed. Mix for 15 to 30 minutes.
- Allow the paste to mature under humid conditions for sufficient time, up to 24 hours for certain types of clay.
- Take a portion of the matured paste and remix it thoroughly. Place it in the cup of the device and level it with a spatula or straight edge to a minimum depth of 1 cm.
- Use an appropriate tool to cut a groove through the paste in the cup along the center line.
- Turn the handle of the device at a rate of 2 revolutions per second. Count the number of blows until the soil specimen comes in contact at the bottom of the groove, along a distance of 12mm due to flow.
- Collect a representative sample of the soil by moving a spatula width-wise across the soil cake, including the portion of the groove where the soil flowed.
- Remove the remaining soil from the cup and mix it with the soil in the evaporating dish.
- Adjust the water content in the mix by either adding more water to increase it or kneading the soil to decrease it. Do not add dry soil to reduce the water content.
- Repeat steps 4 to 10 and determine the number of blows (N) and the water content for each case.
- Plot a flow curve using log N and w (water content) and determine the liquid limit corresponding to N=25.
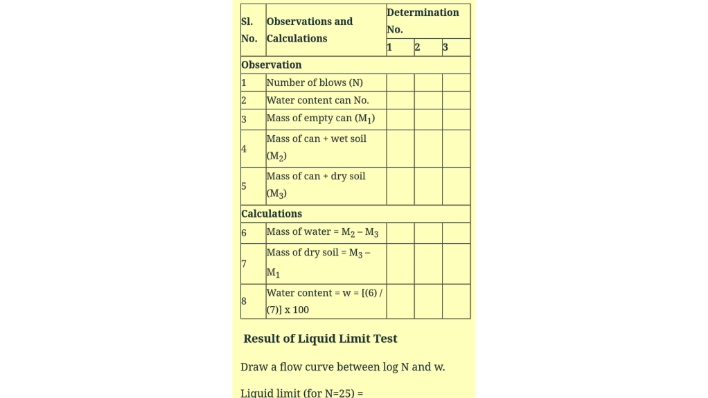
3. Calculation
See the test calculation as given below.

Faqs
The liquid limit of soil can be influenced by its composition, how fine or coarse the particles are, the amount of organic material present, the temperature, and how compacted it is. Soils with more clay tend to have higher liquid limits than those with sand or gravel.
The liquid limit and plastic limit are tests used to figure out how soil behaves. The liquid limit tells us the moisture content at which soil changes from being moldable (plastic) to a more liquid-like state. The plastic limit tells us the moisture content at which soil changes from a moldable (plastic) state to a solid state.
Yes, the liquid limit of soil can change over time. It can be affected by changes in moisture, how compacted the soil is, weathering, and other environmental factors. When assessing the liquid limit, it’s important to consider the current state and conditions of the soil.
The liquid limit test is widely used in construction to check if soil is suitable for different purposes. It helps in designing things like embankments, foundations, and earthworks. It also helps evaluate the stability of slopes, potential settlement issues, and soil erosion.
Yes, there are other tests to determine the liquid limit of soil. One such test is the fall cone test, where a cone-shaped device is pushed into the soil to measure its resistance. This test gives a quick estimate of the liquid limit without needing complex equipment like the Casagrande device. However, the fall cone test may not work well for all soil types and is often used together with the traditional liquid limit test.